Installation and Administration
In This Topic
Before using the web parts contained in the suite you must first register them on your SharePoint server(s). The following list shows the supported versions of SharePoint:
Windows SharePoint Services 3.0 (WSS)
SharePoint Server 2007
SharePoint Server 2010
SharePoint Server 2013
SharePoint Server 2016
The Nevron Web Parts are forward and backward compatible – you can save and load Chart/Gauge/Map/Barcode templates from different versions of SharePoint.
Nevron SharePoint Vision ships with two wizards that can help you register the web parts to some of the existing web applications on the server or install examples web applications that demonstrate the capabilities of the web parts.
When deploying the solution to a web farm you have to run the installer on a server that acts as a "Web Front End" (WFE). You do not have to run the installation on each of your Web Front End servers.
Deploying Nevron Web Parts to web application(s)
1. From Start\Programs\Nevron SharePoint Vision [Version]\ menu start the Web Parts Registration Wizard. The following screen will appear:
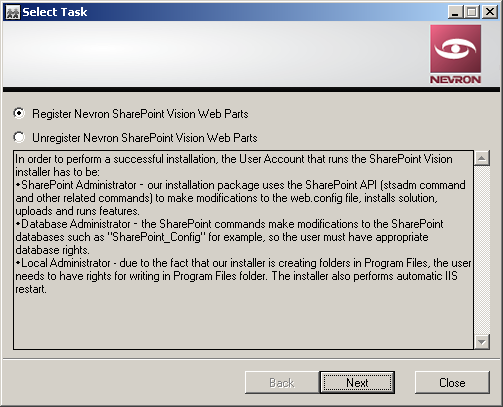
Press the "Next" button to advance to the next page:
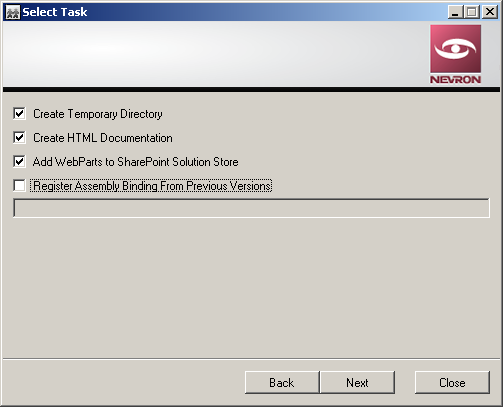
On this page you can select the actions applied by the SharePoint registration tool to the server:
Create Temporary Directory - whether the registrator must create the temporary state and image directories required by the webparts in the suite in order to operate in image acquisition mode "Temp File". It is recommended that you always check this setting.
Create HTML Documentation - whether the registrator must copy the online documentation to the server. This allows you to view the documentation of the product from the web parts designers. Check this setting if you want to make sure you have the documentation deployed on the server.
Add WebParts to SharePoint Solution Store - whether the tool must deploy the NevronSharePointVision.wsp solution (found in the Bin folder after installation) from the SharePoint solution store. It is recommended that you always check this setting.
Register Assembly Binding From Previous Version - you have to check this option in cases when you port a web applications that use a previous version. For more information check out the Upgrading From Previous Versions topic.
Press the "Next" button to advance to the next page:
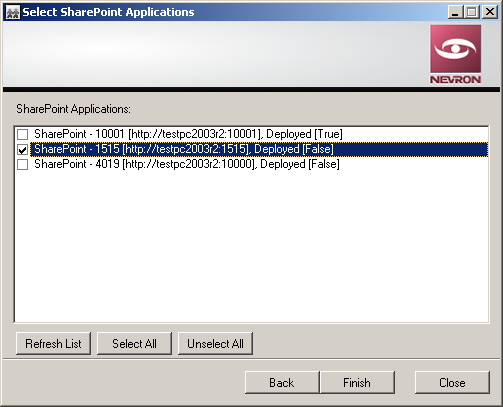
On this page you can select the web applications where you want to deploy the web parts. Note that next to each application the list will also show whether the webparts are deployed or not.
When you press the "Finish" button the wizard will start the deployment process:
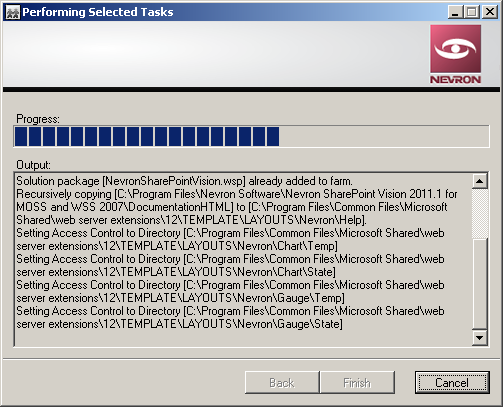
Now you can use the web parts contained in the suite in the web applications you selected. For more information check out the Adding the WebParts to Pages topic.
Unregistering Nevron Web Parts from web application(s)
In order to unregister the web parts start the registration wizard and select "Unregister Nevron SharePoint Vision Web Parts" option:

Press the "Next" button to advance to the next page:
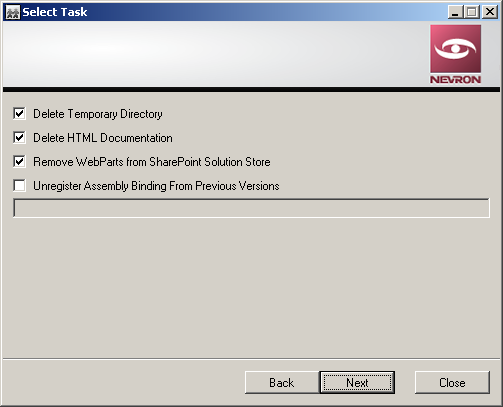
this page you can select the actions applied by the ShareOoint registration tool to the server:
Delete Temporary Directory - whether the registrator must delete the temporary state and image directories required by webparts in the suite in order to operate.
Delete HTML Documentation - whether the registrator must delete the online documentation from the server.
Remove WebParts from SharePoint Solution Store - whether the tool must remove the NevronSharePointVision.wsp solution (found in the Bin folder after installation) from the SharePoint solution store.
Unregister Assembly Binding From Previous Versions - you have to check this option in cases when you first registered assembly bindings from a previous version. For more information check out the Upgrading From Previous Versions topic.
Note that each of these tasks will affect the operation of all web parts deployed on that server.
Press the "Next" button to advance to the next page:
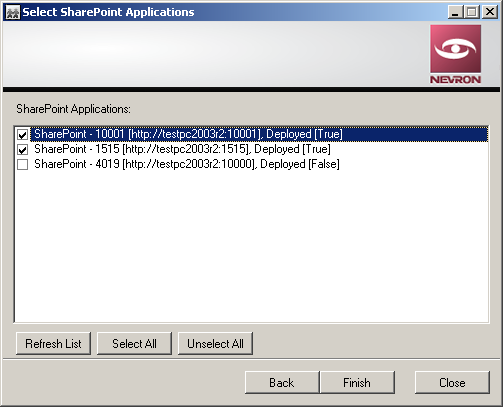
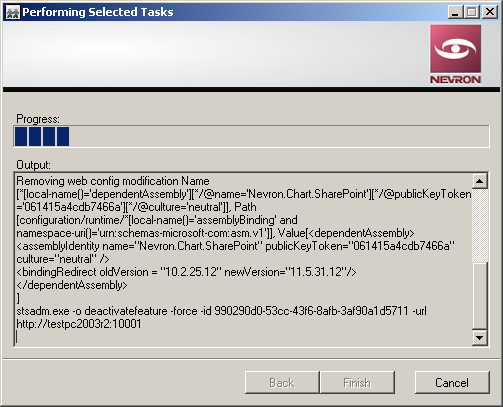
As with the deployment scenario above on this page you can select the web applications from which you want to unregister the Nevron Vision Web Parts. When you press the Finish button the wizard will begin the unregistration process:
Deploying Nevron Web Part Examples
Nevron SharePoint Vision ships with an extensive set of examples showing how to use various features of the webparts in the suite. In order to deploy the example to the SharePoint server go to Start\Programs\Nevron SharePoint Vision [Version]\ menu and start the Examples Registration Wizard:

Press the "Next" button to advance to the next page:
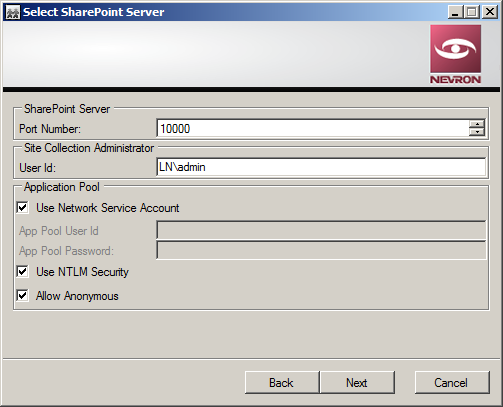
On this page you must select the port number and User that owns the newly created application. In general the settings are identical to the ones you specify when you create a new web application/site collection form Central Administration:
Port Number - the port number where you want to install the application.
User Id - the user id of the web site collection primary administrator
Use Network Service Account - whether to use the Network Service account or to specify an account
App Pool User Id - the user id of the application pool account
App Pool Password - the password for the application pool account
Use NTLM Security - whether to use NTML security. When unchecked the new web application will use Kerberos security.
Allow Anonymous - whether to allow anonymous access
By default the wizard will fill in the currently logged user in the User Id field.
Press the "Next" button to advance to the next page:
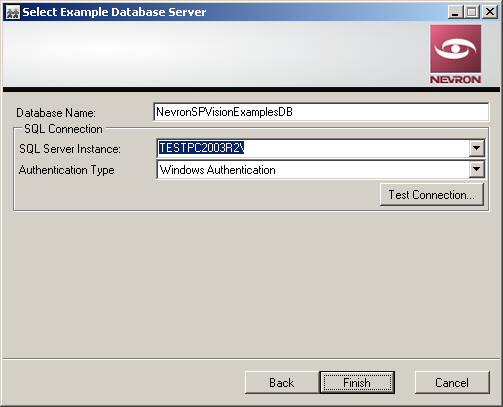
On this page you must select an SQL Server Instance and Database name where SharePoint will create the example database for the newly created web application.
Database Name - allows you to type a database name for the example database. By default the example will use NevronSPVisionsExampleDB. If this database already exists on the server it will be recreated.
SQL Server Instance - the SQL server instance that will host the newly created example database.
Authentication Type - the type of authentication method to use when connecting to the database. By default the wizard uses "Windows Authentication". You can also select "SQL Server Authentication" from the combo in which case you'll have to provide a valid user name and password.
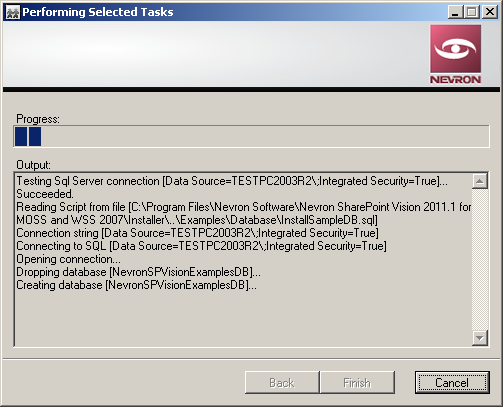
The following picture shows the output page that appears when you press Finish: